Raspberry Pi Fireworks Display

INTRODUCTION
Developing software is in many ways like solving a puzzle - you have all the different pieces and you try your best to make them fit perfectly, creating amazing synergy.And while this may be fun, it can feel a bit too...2-dimensional.
A few years ago we were introduced to a small computer called “Raspberry Pi”, it enabled customers to solve different problems, learn more about computers and most importantly - have fun while doing it. Now, personally, I believe many developers around the world saw this as an opportunity to finally bring their software to life, make something palpable and step out of the 2-D world of puzzles that we so much enjoy.
When faced with the multitude of choices and flexibility the RPi offers, we tend to get stuck wondering what exactly it is that we want make out this cool new toy. For me, this decision wasn’t easy at all. I had a college assignment involving RPi, so I wanted to make sure that I assembled something that would fit the general assignment criteria, but also have lots of fun while doing it. I kinda wanted to make something with fireworks, so I went back and forth until it finally came to me - a fireworks detonator!
The idea was to make a hardware interface with a software solution, connect it to the internet and allow users to light up a sparkler from a remote or local location.
NAPKIN MATH AND MATERIALS ACQUISITION
A Raspberry Pi with a protoboard was an obvious choice for this project. I used a lot of standard wires for the microelectronics portion and a few LEDs to make sure it all worked.I wanted fancy packaging, so I made a spy-like briefcase. Nice, right?
Remember your old cutlery case - don’t throw it out! Mine was a leather-covered, plywood case, which was easy to mold to adhere to my needs.
The next step was more challenging, making sure I mounted all the hardware into this wooden box properly. Finally, I decided to use a plexiglass chassis, which could fit into the briefcase.
The hardest part was figuring out how the ignition would work. After a lot of research and napkin math, I figured out that I needed some sort of metal that would warm up easily to open flame temperature, but without using a lot of power. Keep in mind that this was my first electronics project and it wouldn’t be a good idea to use mains current, I didn’t want any fatalities.
Two materials came to mind - Kanthal and Nichrome. Now, in Belgrade, it quite difficult to acquire these material, unless you’re an enterprise working with heating elements. Luckily, with a little research and determination, I was able to identify that these type of wires are used in electronic cigarettes and found a store that sells them.
The RPi’s GPIO voltage limitation is around 3 volts - even for a very thin wire, this wouldn’t be enough to heat it up to around 700 degrees Celsius, which is what we need to hit in order to ignite fireworks.
This meant that it needed two separate current inputs - 5V for the RPi and ~13V/5A to heat up the wires. Of course, it also meant that it needed two separate electronic circuits, so I decided to use a physical switch (relay) for this.
Final “shopping” list:
- Raspberry Pi + 5V charger + WiFi dongle + wireless keyboard/mouse
- Wires
- Kanthal or Nichrome wire
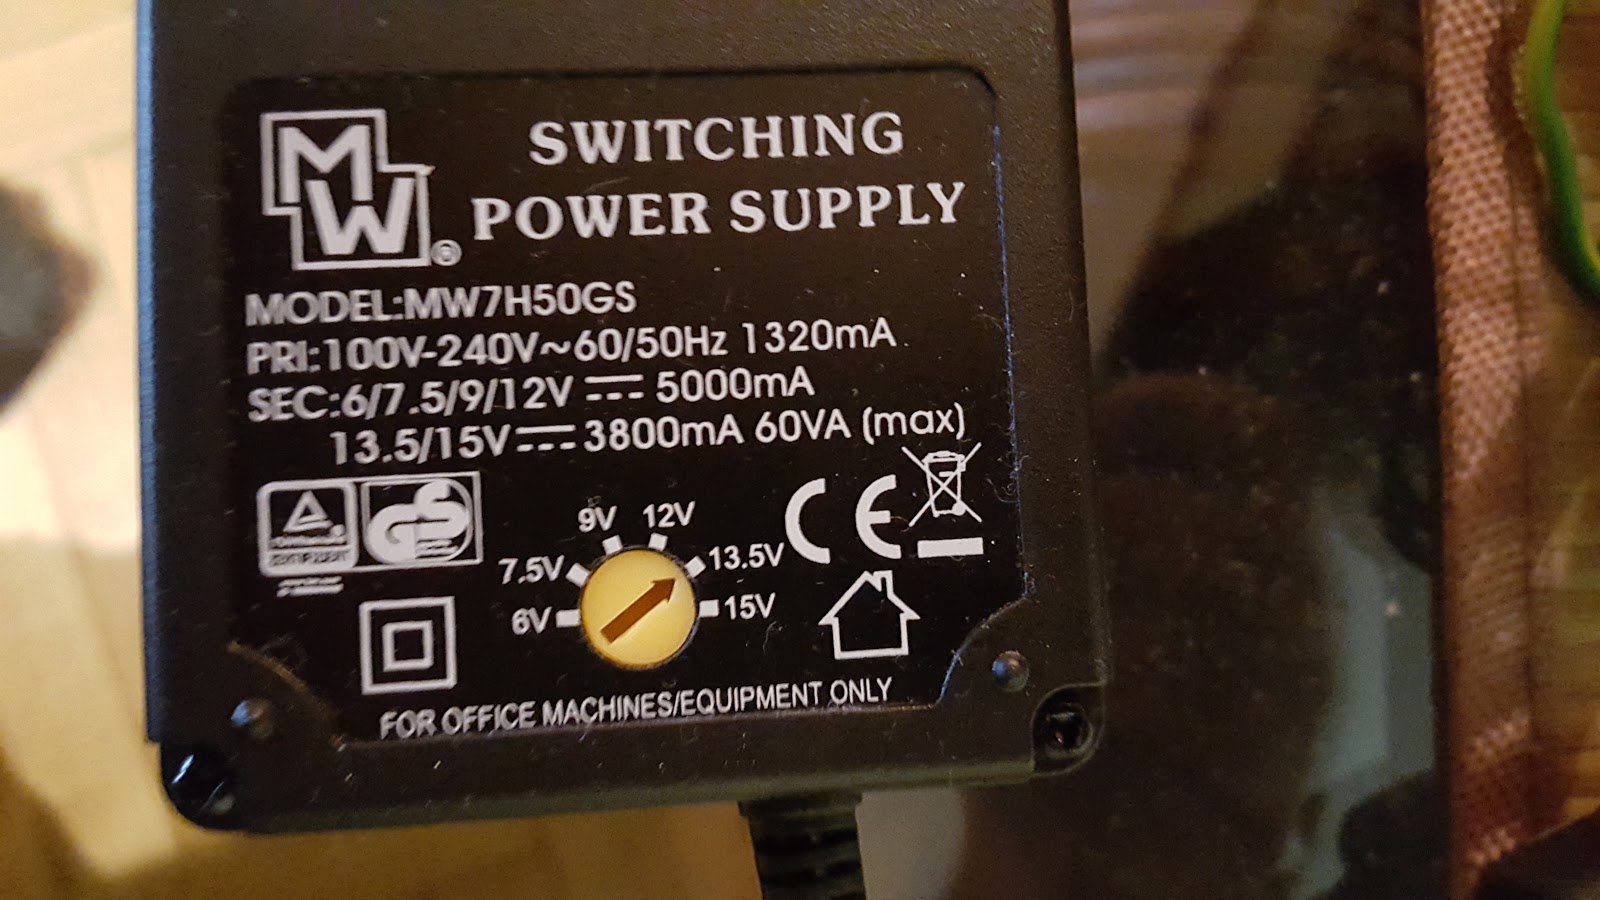
- 13V charger, ideally with adjustable voltage
- Relay (with as many channels as you’d like to have your fireworks attached to)
- Couple of LEDs, toggle switch, button
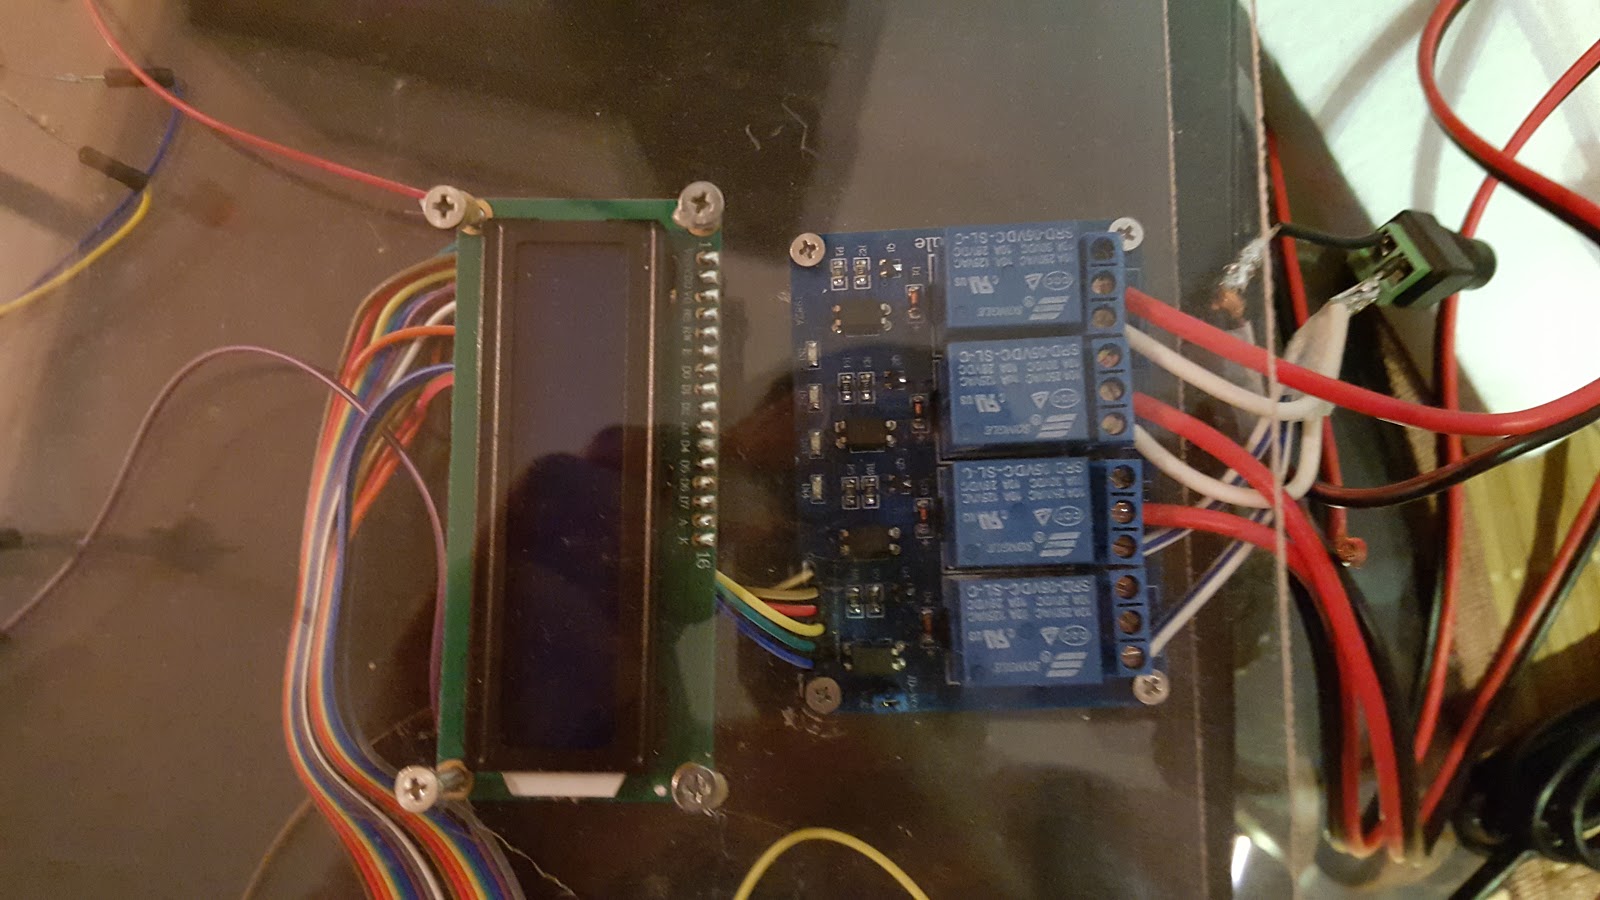
- LCD display (16x2 in my case)
- Fireworks (eg. sparklers)
- Wooden briefcase
- Plexiglas
- Screws, power tools for wood and plexiglas modifications
WIRING UP THE HARDWARE
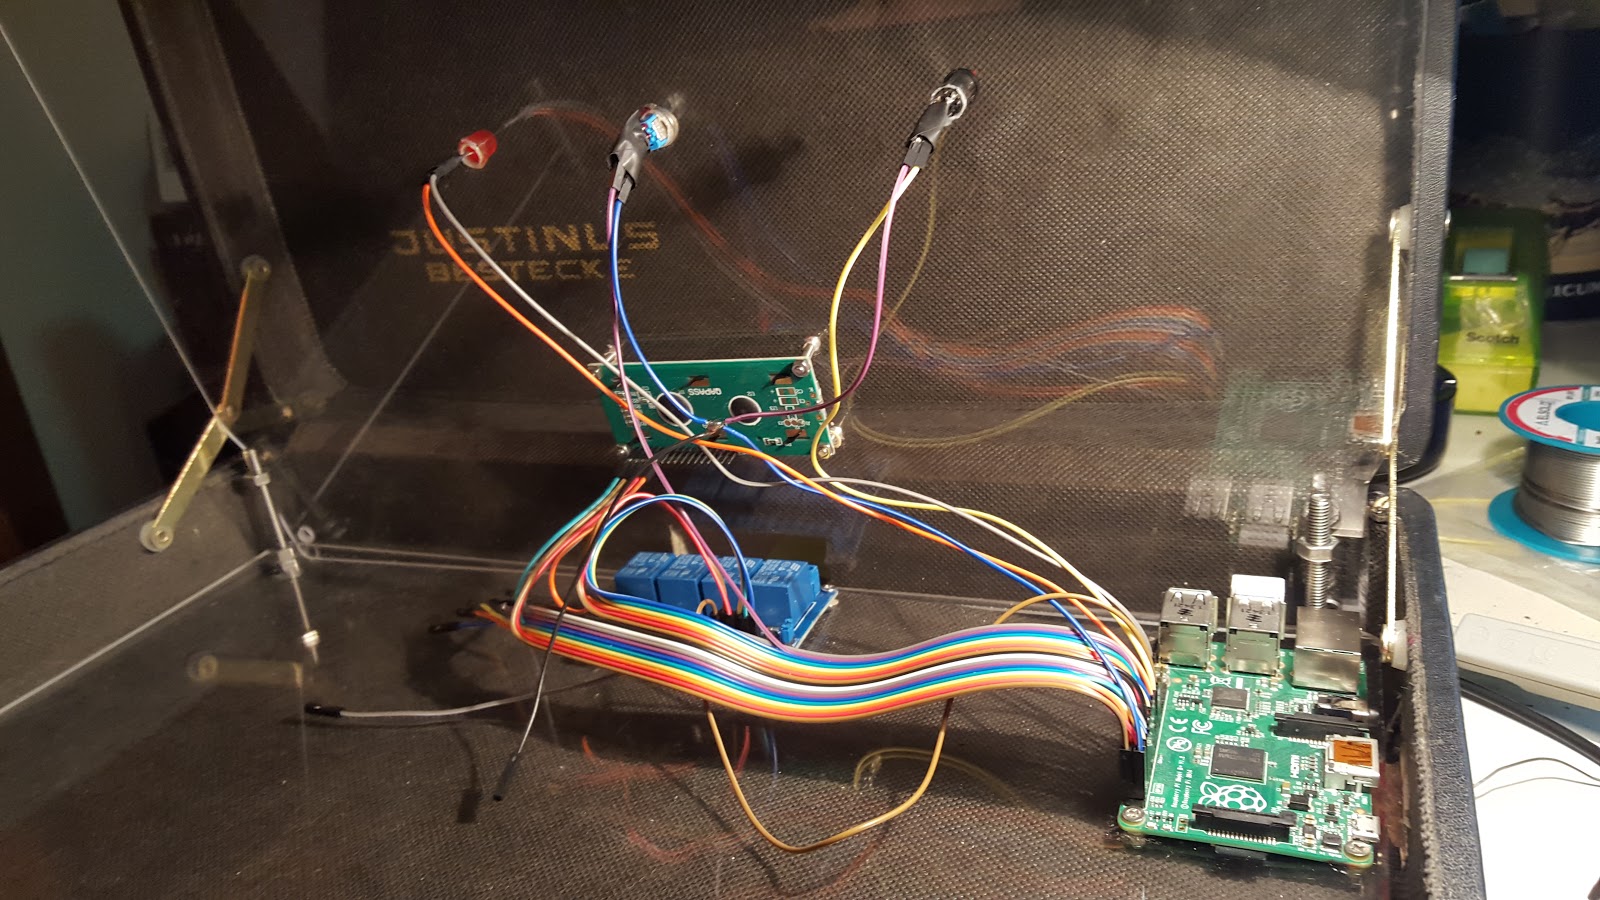 To make this as nice and smooth as possible we want to have 2 layers of plexiglas setup.We’ll place the Raspberry Pi on the bottom layer with the relay and connectors and the 16x2 LCD, toggle switch, button and LED, on the top layer.
The user should be able to see the status of each firework on the LCD, arm the system by switching the toggle switch and “detonate” the fireworks by pressing the button or through the web application.
When soldering, it’s important to be really careful especially when working with LCDs - they’re quite fragile and you could end up burning your LCD. Soldering can be dangerous if not done properly. Always wear protective laboratory goggles.
Working with plexiglass was where I encountered the most difficulties. It’s very fragile, it chips, and you can scratch it easily. Still, in my opinion, it’s much easier than working with glass.
After the chassis is completed, it’s time to wire everything up. Make sure you check that the system works after each completed step.
For debugging and development purpose, I initially setup my RPi by using an usb keyboard and a mouse which were connected to an external monitor. I configured it to connect to home wifi after every restart.
This is a huge improvement in the development cycle, since you can actually use your computer for all of the development and deploy it by using SFTP on the RPi.
After the initial RPI configuration, the first item to check is the relay. There are plenty of tutorials out here that can guide you through this process. However, the idea is to make sure that every relay channel works properly. This means that you’ll want to write a simple script that enables and then disable each individual relay channel. Unfortunately, I figured this out too little too late, and one of my relay channels didn’t work at all.
If you have a charger with variable voltage, you can actually test your relay setup.
To do this, switch your charger to approximately 3V and use your relay to “terminate” the 3V wire. In this case you’ll want to use your LED for testing and have the ground wire from your 3V charger always connected to the LED, and your positive (3V) wire terminated by using the relay.
Wiring the relay correctly is really important, if you don’t, you may end up frying your RPi. I suggest you look up multiple tutorials on this subject, and especially those pertaining to your RPi and relay model.
If you wired this part correctly, your LED should light up once you switch the relay on, and it’s time for the next step.
Instead of LED, we’re going to use the Kanthal wire next. You should wrap it around the wires going into the relay and hold your wires by insulation.
Do not touch kanthal wire. It can get very hot.
Switch your charger to 9V.
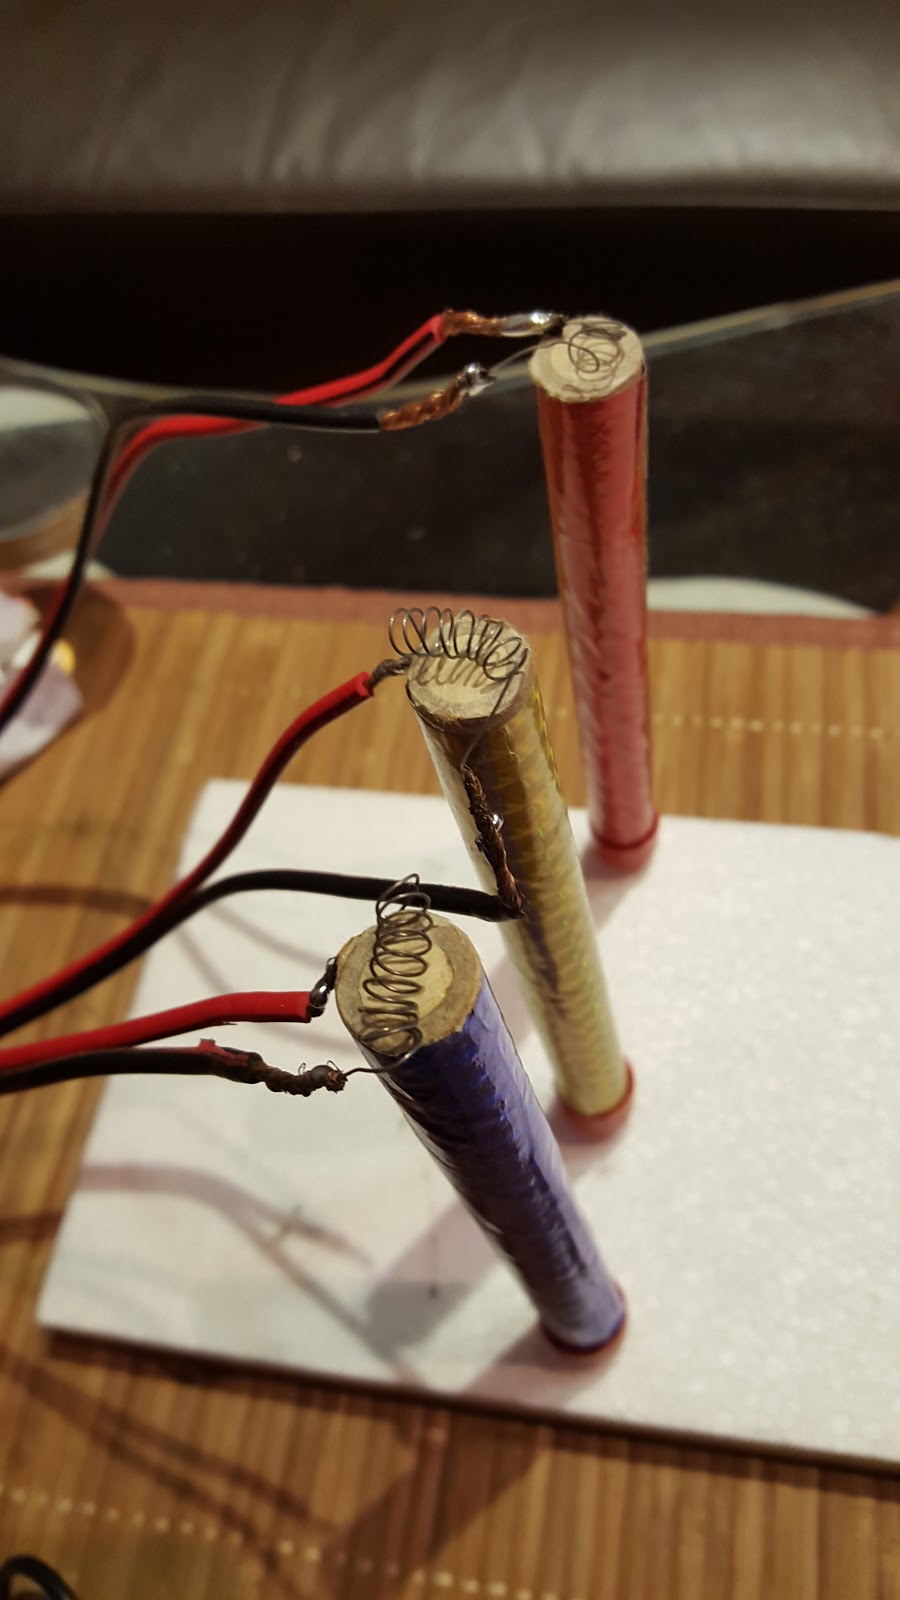
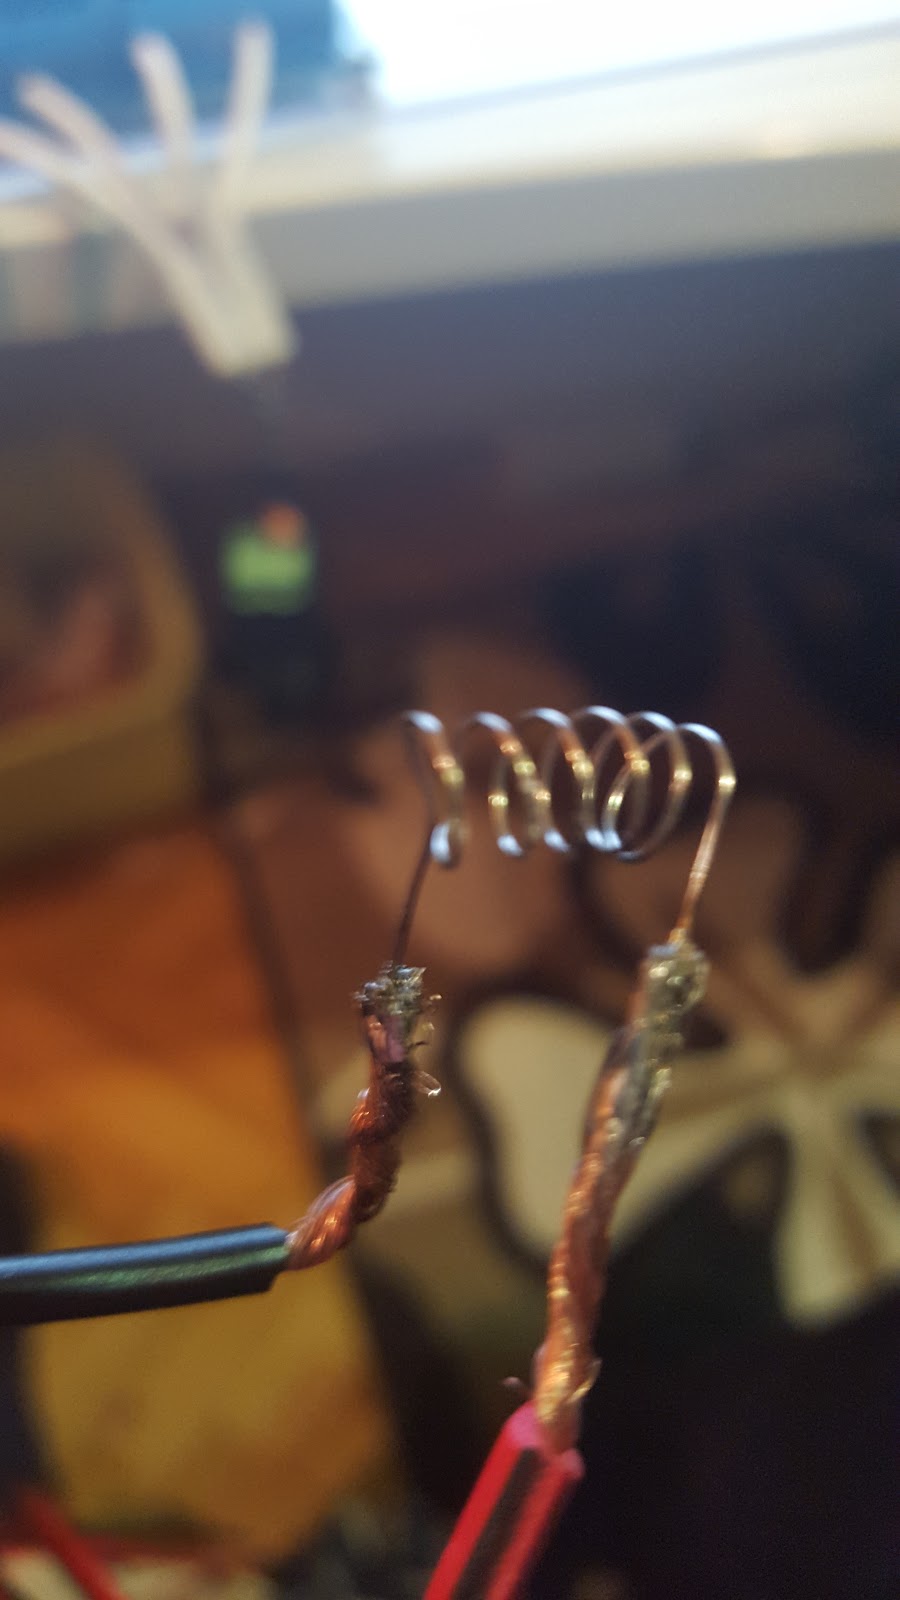
At this point, when you switch your relay, the kanthal will get very hot -- red hot.
If it’s not working, it’s possible that your copper wires and kanthal wire do not have enough contact between them. I found a “helping hand” can be very useful in these situations.
The rest of the setup was basically connecting all components to the RPi - simple and straightforward.
Probably the most challenging aspect of the wiring portion is the LCD, since you’ll have to use anywhere from 12 to 16 wires (or more) depending on your LCD.
After you connect your LCD, test it by running a simple script to write some output. I’ve noticed with LCDs there are many things that can go wrong. If you wire it or solder incorrectly, you’re likely to fry it. If this is the case - nothing will display on the LCD or all rows on the display will show empty boxes.
However, keep in mind that if you’re seeing something similar to this picture above, it doesn’t necessarily mean that your LCD is broken. Some LCDs come with a potentiometer that have to adjusted before seeing letters on the screen.
If you don’t have previous experience with LCDs, I suggest finding easy-to-use models, ideally a 16x2 LCD, as they’re the easiest to connect and work with.
I threw out two displays before getting the third one to work. The first one seemed broken from the get go, but I fried the second as a result of a wiring error (count your pins people) :)
Once your LCD is working and the relay with kanthal (or nichrome) as well, you’re pretty much in the clear. Only cosmetic touch ups are to follow.
SOFTWARE - MAKING HARDWARE COME TO LIFE
At this point you have all the parts working correctly, the wiring is good and you haven’t burned down your apartment - good job!Now it’s time to make sure it all works together properly.
I’ll assume you have basic knowledge of RPi, Python and GPIO manipulation, as well as software development in general.
There are various tools and languages we can use to make the application interact with the RPi, for instance, NodeJS for realtime RFID reading.
In this case, I decided to go with a simple web app in Laravel and Angular to make sure it’s responsive and the UI looks decent on every user device. Laravel served as a REST server which would trigger various Python scripts. I used Python scripts since Python has better library support for GPIO then PHP.
Each time a certain Laravel endpoint was reached, for example, “switch relay on”, the python script would execute with the appropriate parameters.
In this instance, each application is doing what it does best - Angular with Bootstrap is handling the UI, Laravel is acting as a backend server and Python is managing low level hardware.
CONCLUSION
There were various challenges with this project. The fact that it took two months to complete, shows that something that looks simple and straightforward at first, can actually have a lot of depth to it and takes time to achieve results.The briefcase was my biggest challenge, handling power tools wasn’t something I had much experience with. Then came the plexiglass and since it’s so fragile, it required a lot of patience. And let’s not forget acquiring all these different types of material, which aren’t easily accessible, nor cheap.
It probably goes without saying that testing this project in a closed room, is not the best idea. For my demo I used cake sparklers and lighting up only three at the same time resulted in a lot of smoke. Even worse, for one of my initial test runs, I used an outdoor fireworks sprinkler inside the apartment. The test performed perfectly, but the room was filled with smoke for the next 2 hours and left burn marks on both my wooden floor and ceiling. Exercising caution when working with fireworks is a must, I learned it the hard way.
Overall, the project was a success! I had fun assembling this new toy, which made all the time and effort invested, worthwhile.
FINAL RESULT
To download the video of the final result, click here.