Tech Stack: Gatsby + Contentful + Netlify

If you want a modern, fast, and elegant tech stack with some really nice features for a modern publishing flow, our new favorite tech-stack might be a good fit for your website! Read on to find out how Gatsby + Contentful and Netlify enable us to rapidly develop your new infinitely-scalable content publishing platform that’ll save your content editors time and impress your users with incredibly fast loading times.
We recently moved our company website to this stack. In this post, I’ll provide some useful instructions and sum up the main benefits of using Gatsby as a static site generator, Contentful as a content platform, and Netlify for the website hosting.
Gatsby Overview
Gatsby is a “free and open source framework based on React that helps developers build blazing fast websites and apps”. It acts like a static site generator, so during a build Gatsby generates static html files and resources.
During the build you can fetch all your blog posts or any other content type and create static pages of them.
Gatsby makes use of GraphQL for data management, so it’s very easy to access the data you want.
If you follow all guidelines your Gatsby website should be incredibly fast. This is because once loaded, Gatsby prefetches all other pages, so moving around the site feels noticeably faster.
Contentful CMS
Contentful is an API content platform. The main difference between Contentful and other CMS options, like a Wordpress, is that you have more freedom and flexibility with Contentful. It works with any platform (Mobile, Web, etc.) and it exposes the data as JSON so you are able to choose the technologies you want to develop your site or app.
Contentful also allows you to preview any content change before publishing using the Preview API and Gatsby Cloud. Whenever you click the Open Preview button it triggers a preview build on the Gatsby Cloud and allows you to see current preview changes before publishing.
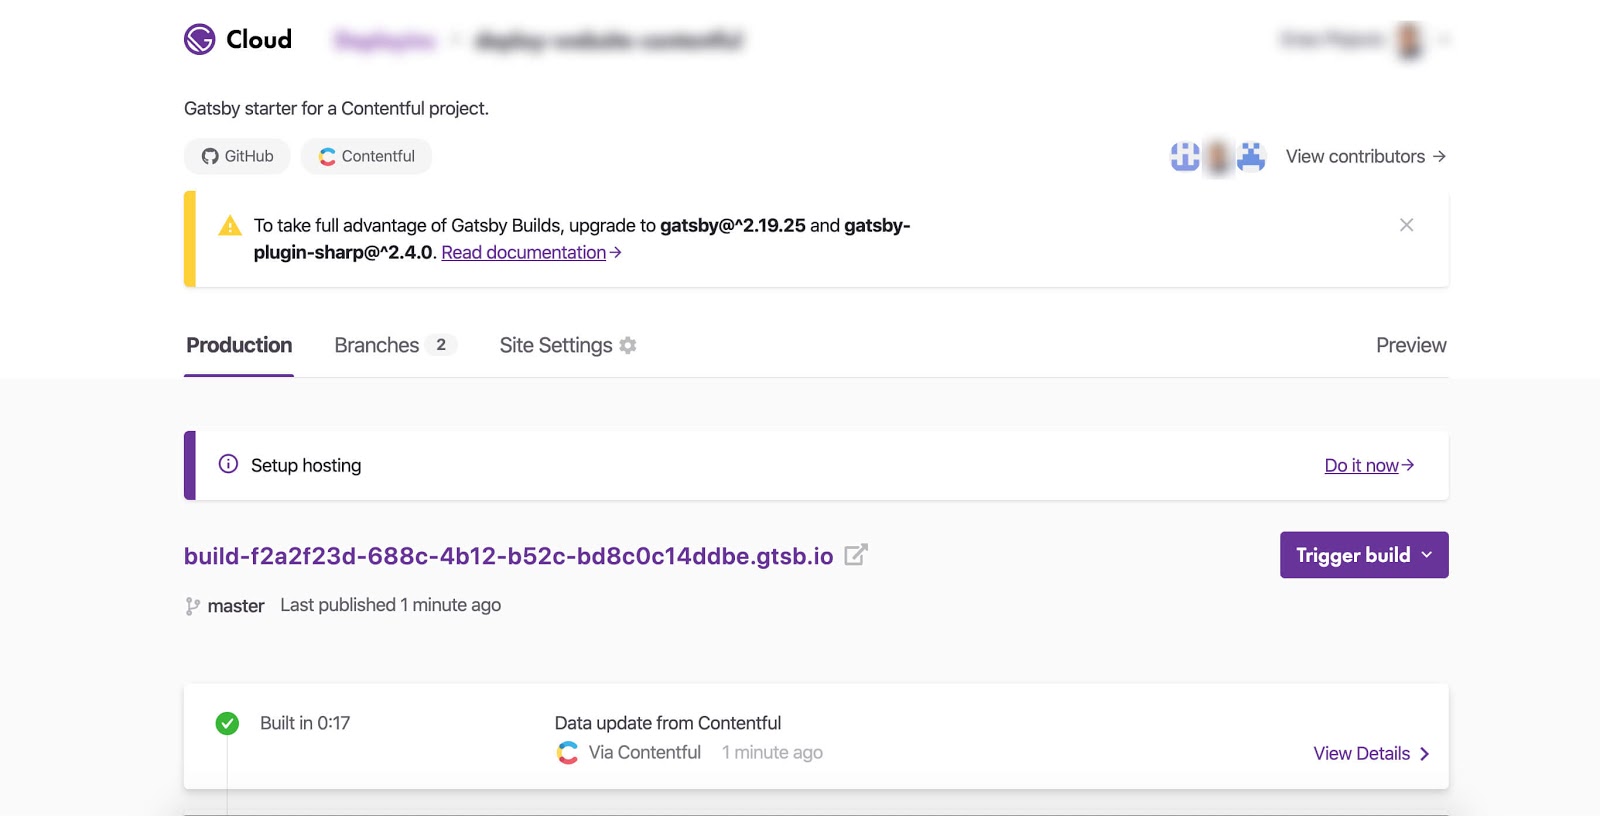 Source: https://www.gatsbyjs.com/dashboard
Another great feature are the Webhooks. This can be used to automatically trigger builds on any content change, content model update, etc. It works perfectly with Netlify, so all you need to do is to grab the Webhook URL from Netlify, add it to Contentful, and every time content changes it will send a POST request to the Webhook URL that will trigger a build on Netlify.
Netlify
Netlify is a web hosting infrastructure that allows you to deploy your static website in just a few easy steps. It works with Github, so all you need to do is connect to your Github repository and Netlify will pull your code. One of the best features is that it will trigger a build every time you commit to a specific branch. It also automatically builds a preview for all created pull requests, which is great because we all want to see the changes before pushing to the production branch.
While building our site, we needed a small backend to handle email sending from our contact form on the site. Netlify thought of that as well, so there are functions (“Powered by AWS Lambda. Simplified by Netlify.”) baked in to support that need. All you need to do is to create a functions folder and .js file with the function name inside -- Netlify then deploys the function you write as an API endpoint.
Netlify Forms are another great feature. It is used for collecting form data from the site. Usage is very simple, all you need to do is to add a name attribute to the form which contains the form name and input like this:
<input type="hidden" name="form-name" value="site-contact-form" />
If you want to submit a form using AJAX, just send a POST request to the “/” url with all form fields.
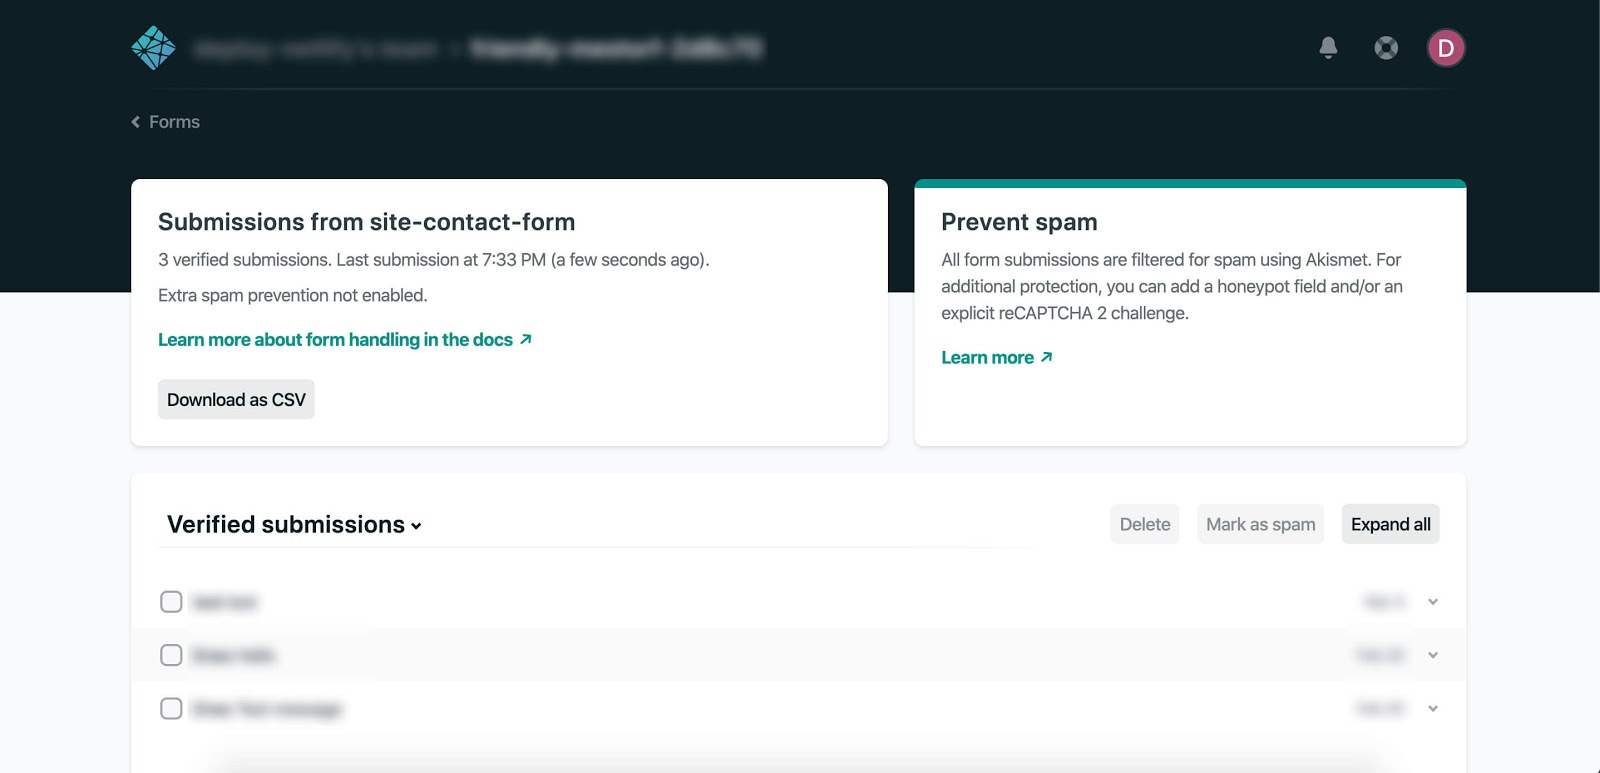 Source: https://app.netlify.com/
Gatsby, Contentful and Netlify are a perfect fit if you want to build fast and secure websites. The main benefit is that everything is quite simple starting from Contentful setup, integration with Gatsby and deployment in just a few steps using Netlify.
If you haven’t already, you should definitely give it a try!
Project Setup
Before you start, I suggest you check out a great Gatsby starter for a Contentful project boilerplate: https://github.com/contentful-userland/gatsby-contentful-starter.
The next step is to add a Contentful access token and Contentful space ID (you can find them in Contentful -> Settings -> API Keys). Just copy and paste them inside the .env.example file and rename it to .env.development. If you want to have multiple environments (development, production, etc.) just create a .env config file for each of them. E. g. .env.development, .env.production.
Now you are ready to run your project locally! To do it just run yarn run dev, it will run a local server on http://localhost:8000. In the README.md you can find more commands.
Adding new pages is really simple -- inside src/pages folder just create a new file with .js extension, file name is the page slug.
That’s it. Now you should have a simple Gatsby + Contentful website running.
If you need some type of backend functionality, I’d recommend Netlify functions. You can develop them on your local machine as well. The next step will be setting up Netlify dev locally.
Make sure that you have netlify-cli installed globally as an npm package, if you don’t have that, install it:
npm install netlify-cli -g
Now you are ready to run the entire platform on your machine with the following command:
netlify dev
It should run the development server locally.
Netlify functions
Create a functions folder and helloWorld.js file inside. Example:
functions/helloWorld.js
exports.handler = async (event, context) => { return { statusCode : 200 , body : 'Hello World!' }; }
The simple function above will just show a “Hello World” message when you hit the function endpoint. All your functions are available as endpoints in the following format:
http://localhost:8888/.netlify/functions/{functionName}
Notice that the functionName is the name of the .js file. In our case it is helloWorld.
Now it is time to deploy your website to Netlify. Before anything else, make sure that you have a Github repository and push all the code there. When you are done, follow the steps below:
- Go to the Netlify dashboard and click on the “New Site from Git” button.
- Connect your Github account to Netlify.
- Pick the repository.
- Settings: Select the branch you want to deploy from. If you have a specific build command you can enter it.
That’s it! When the build is done, a website should be live and you should be given the URL.
Now if you want to make some changes on the website, just commit and push them to the Git and it will automatically deploy.
All environment variables can be added to the Netlify easily:
- Go to the site settings
- Build and deploy
- Environment
- Environment variables
Happy coding!